Preparation begins with the image
Many jobs arrive as low-resolution PNG or JPG files with compression, unsuitable backgrounds, poor edges, or details that will not hold up at the final print size.
In those cases, I use upscale and Photoshop treatment to recover as much as possible from the image.
When the original material is badly compromised, I can also rebuild parts or generate a new version with the help of artificial intelligence. When this is necessary, the new image can be sent for your approval before final preparation.
The goal is a clean, well-defined file suited to printing, using the treatment each image needs without making the process more complicated than the job requires.
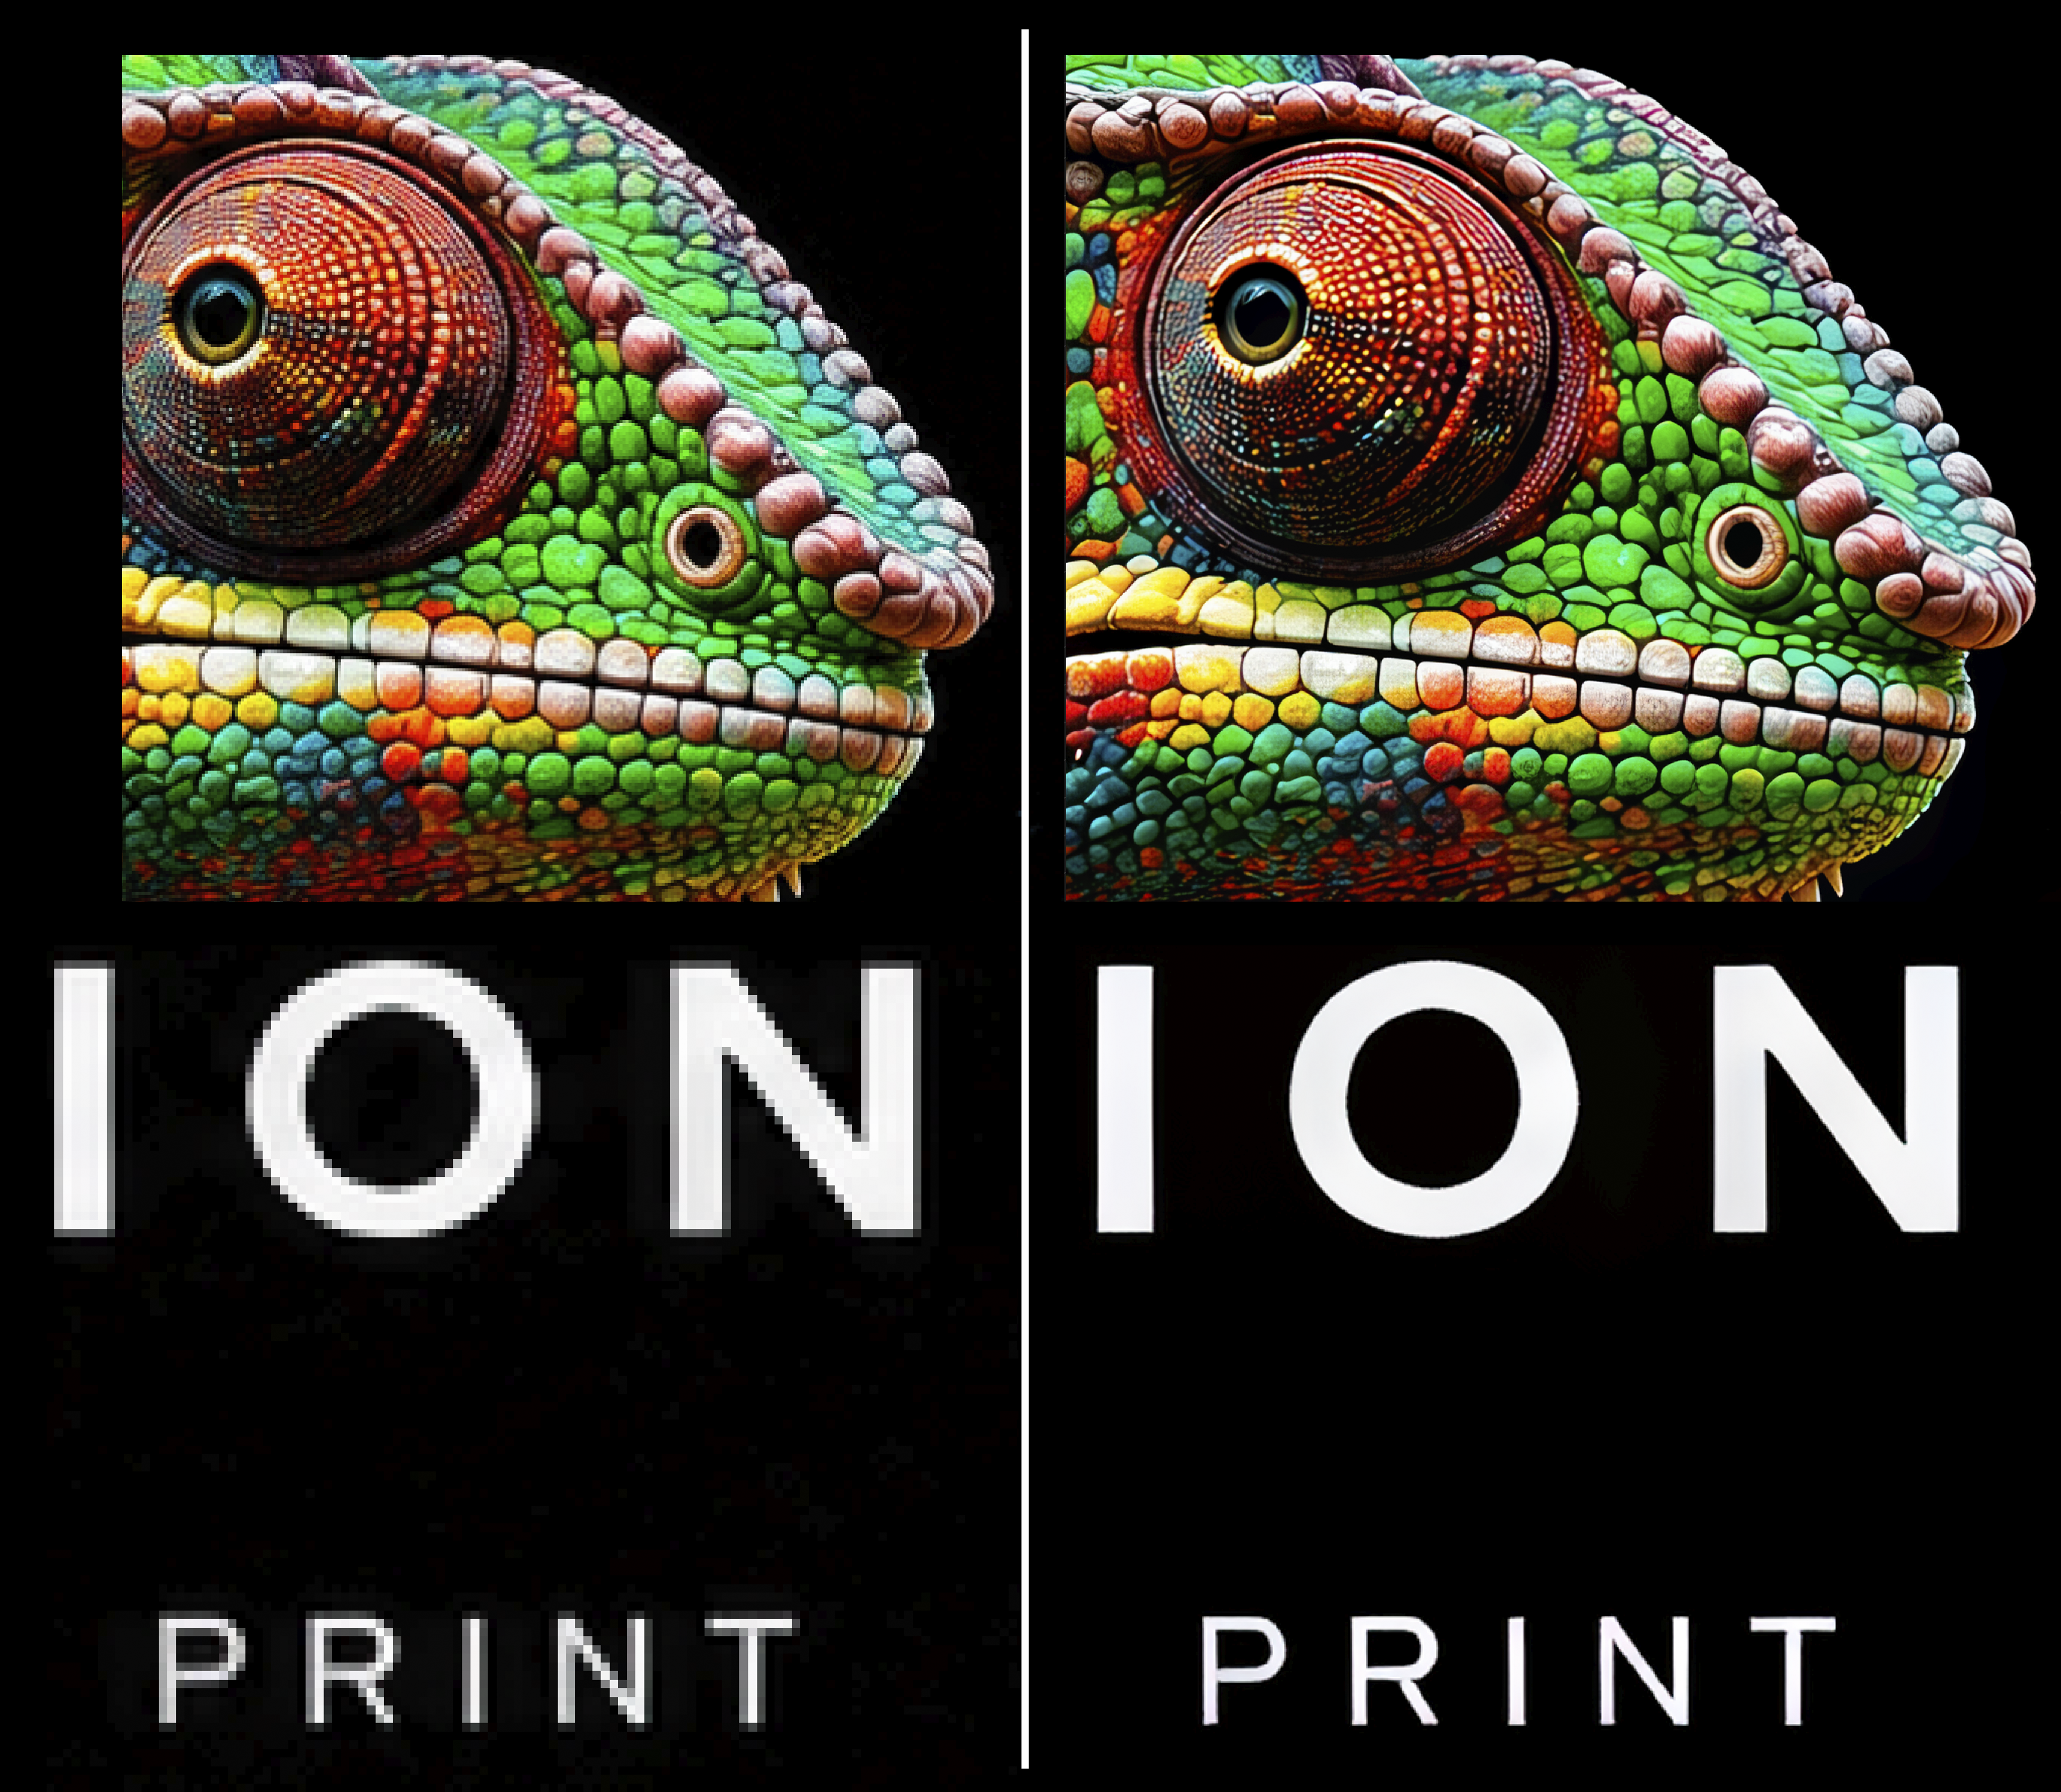
A transparent PNG can solve many jobs
For many clients, a well-prepared transparent PNG is all they need.
In this type of file, I can work on resolution, final size, background removal, edge cleanup, transparencies, and areas with unwanted blur or halos.
It is a simple workflow compatible with many DTF systems.
But some artwork needs more control.
White-base control
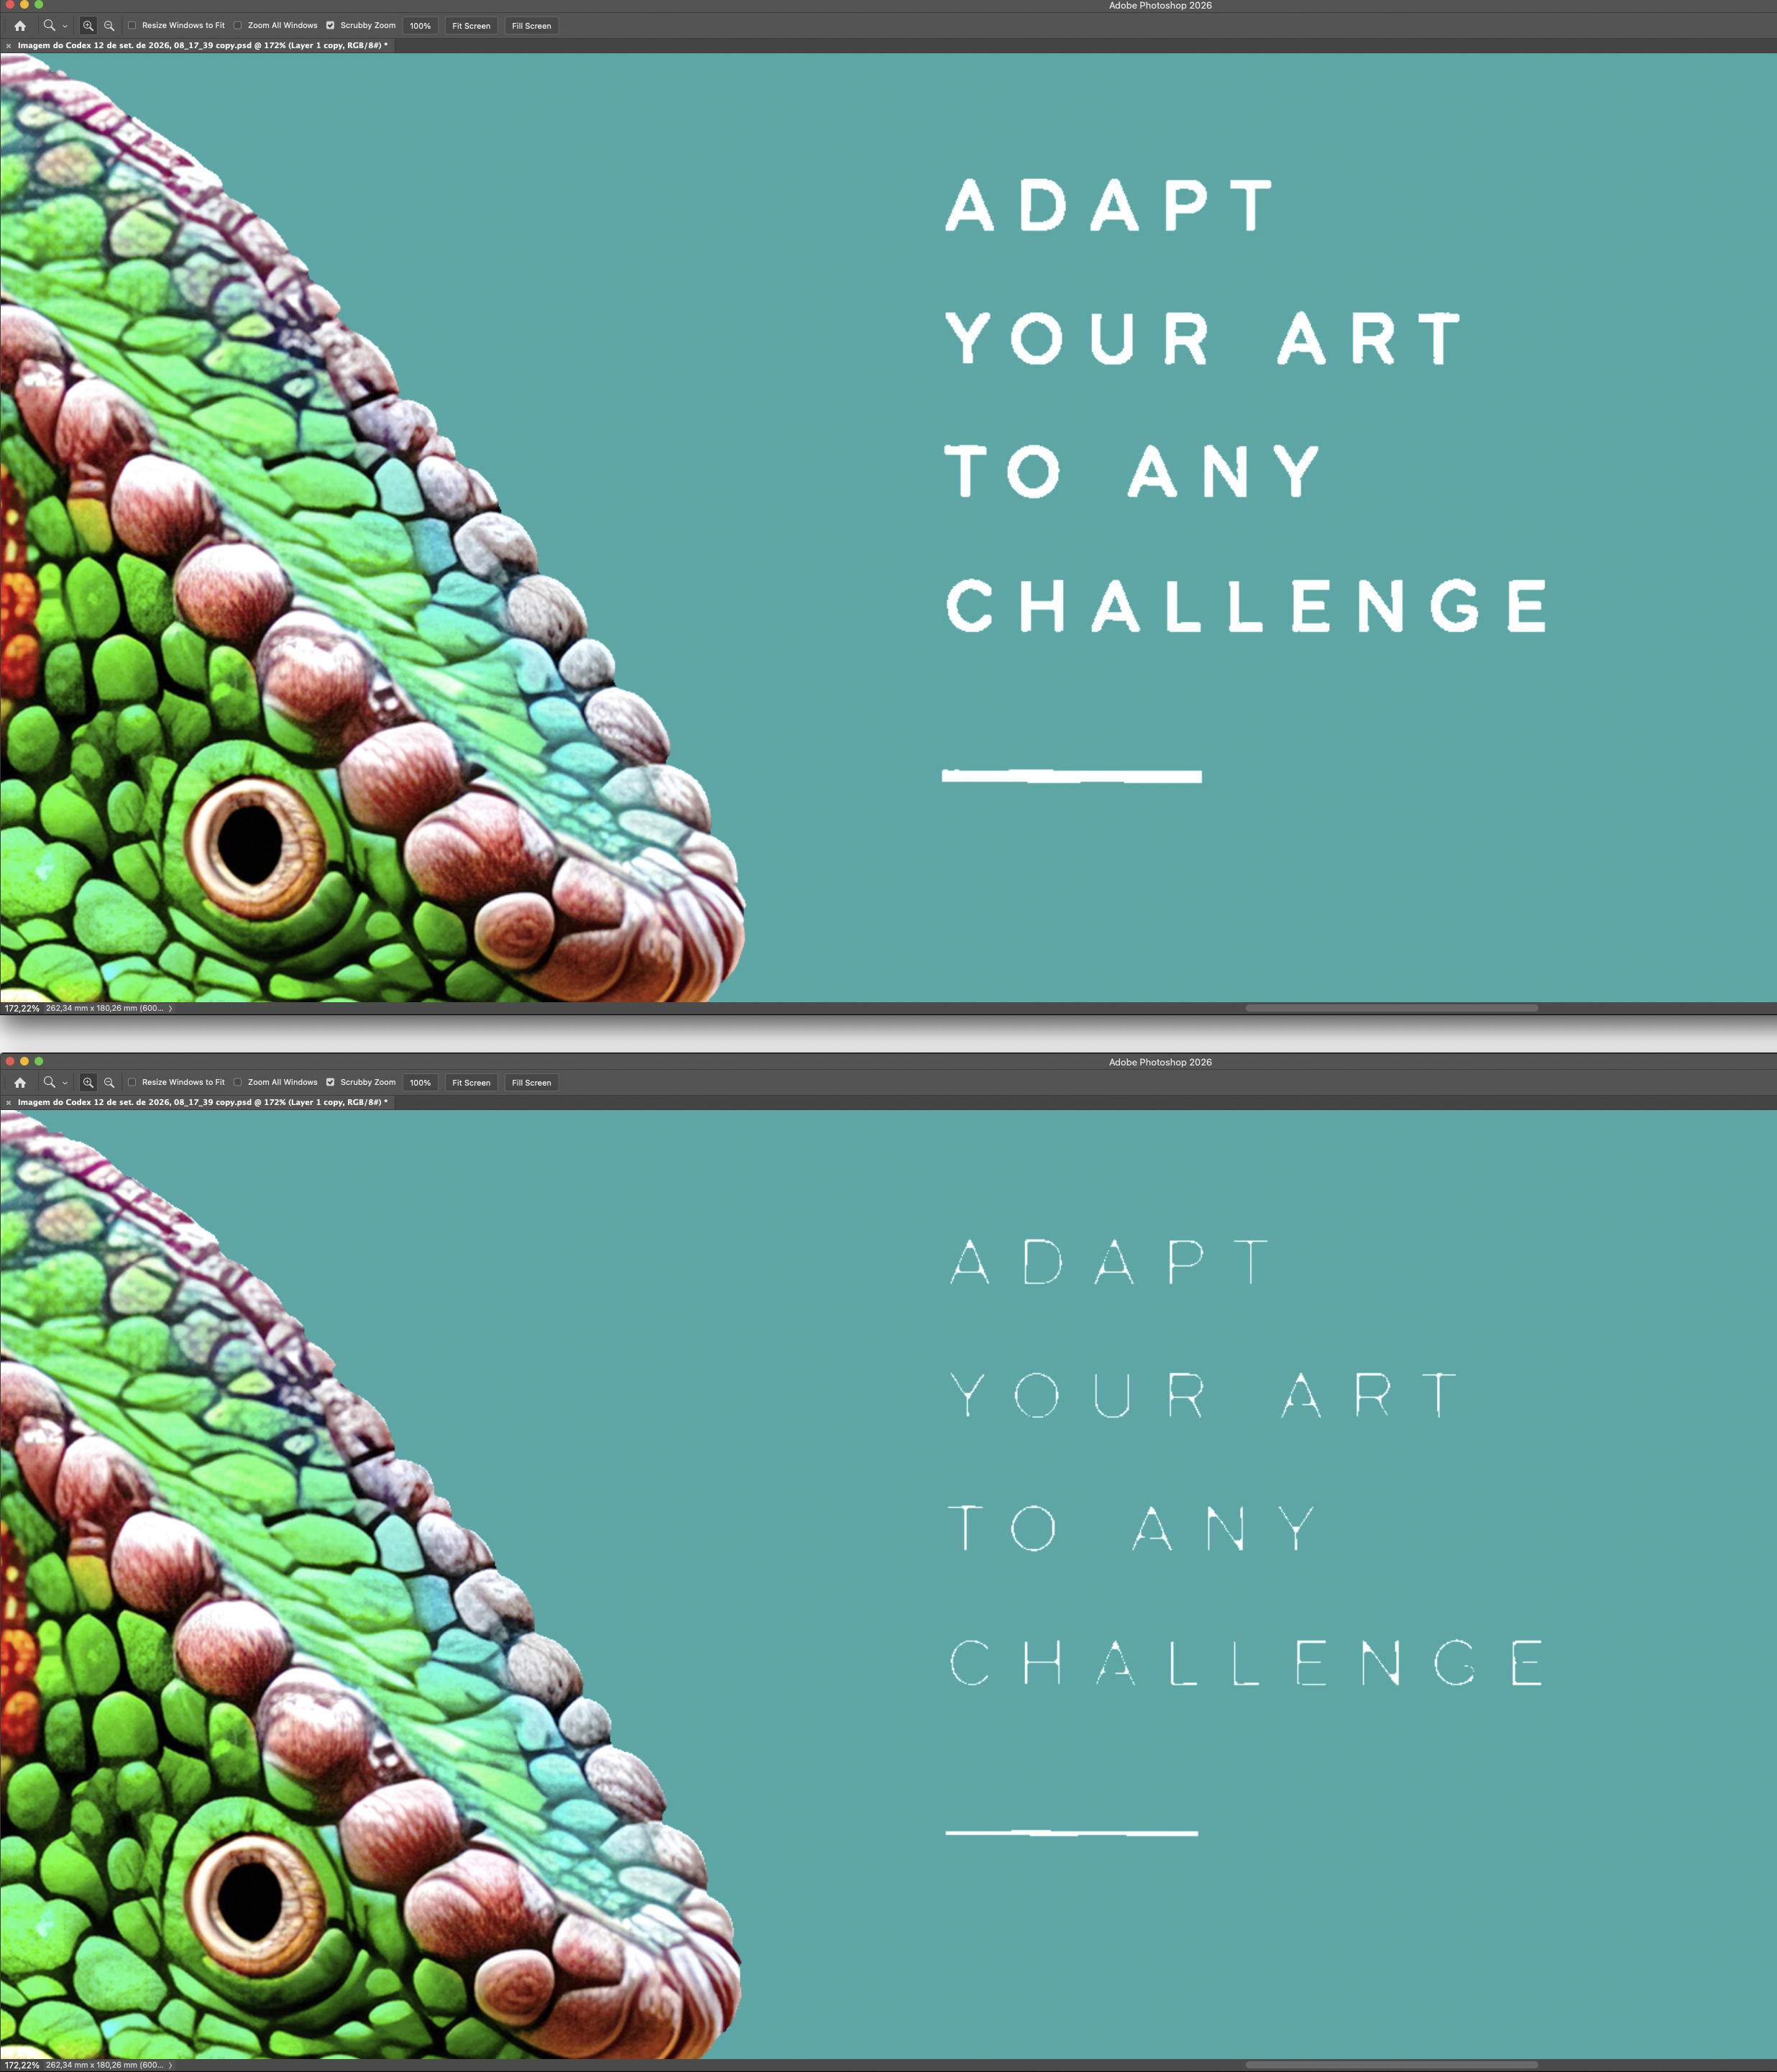
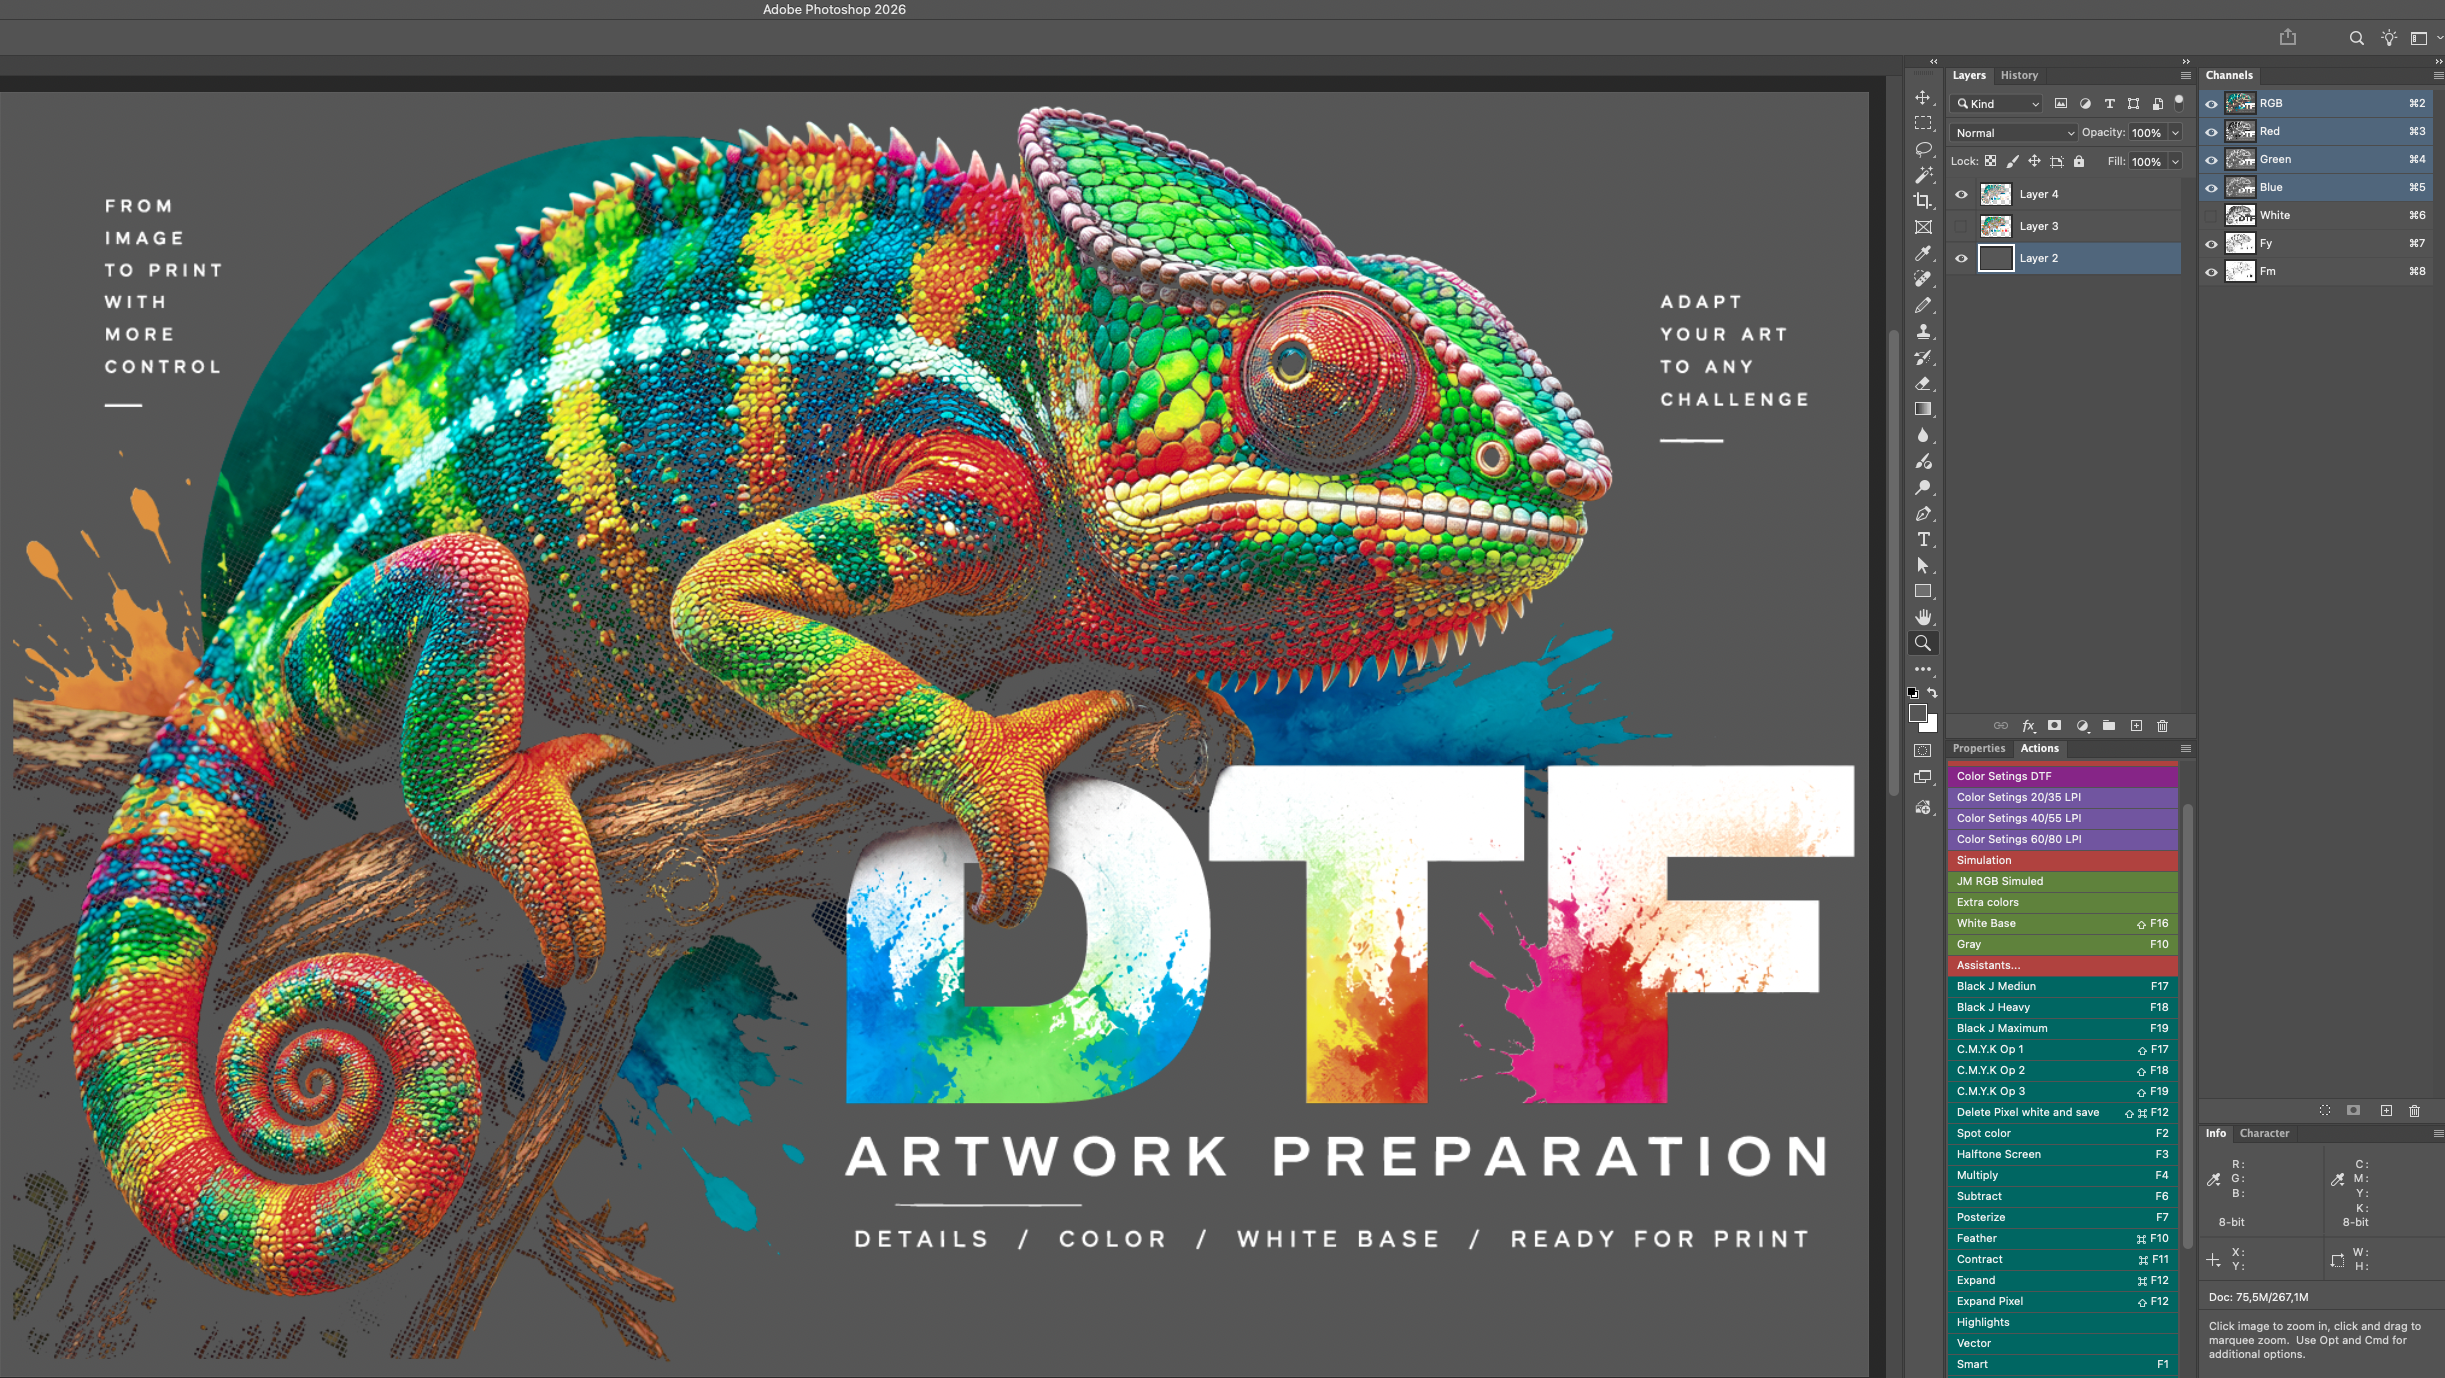
Small white text, fine lines, transparencies, delicate details, and halftone areas may require specific treatment of the white base.
When white reduction is applied globally, areas that should remain strong can also be affected.
Small white lettering, for example, can lose definition if the reduction is excessive.
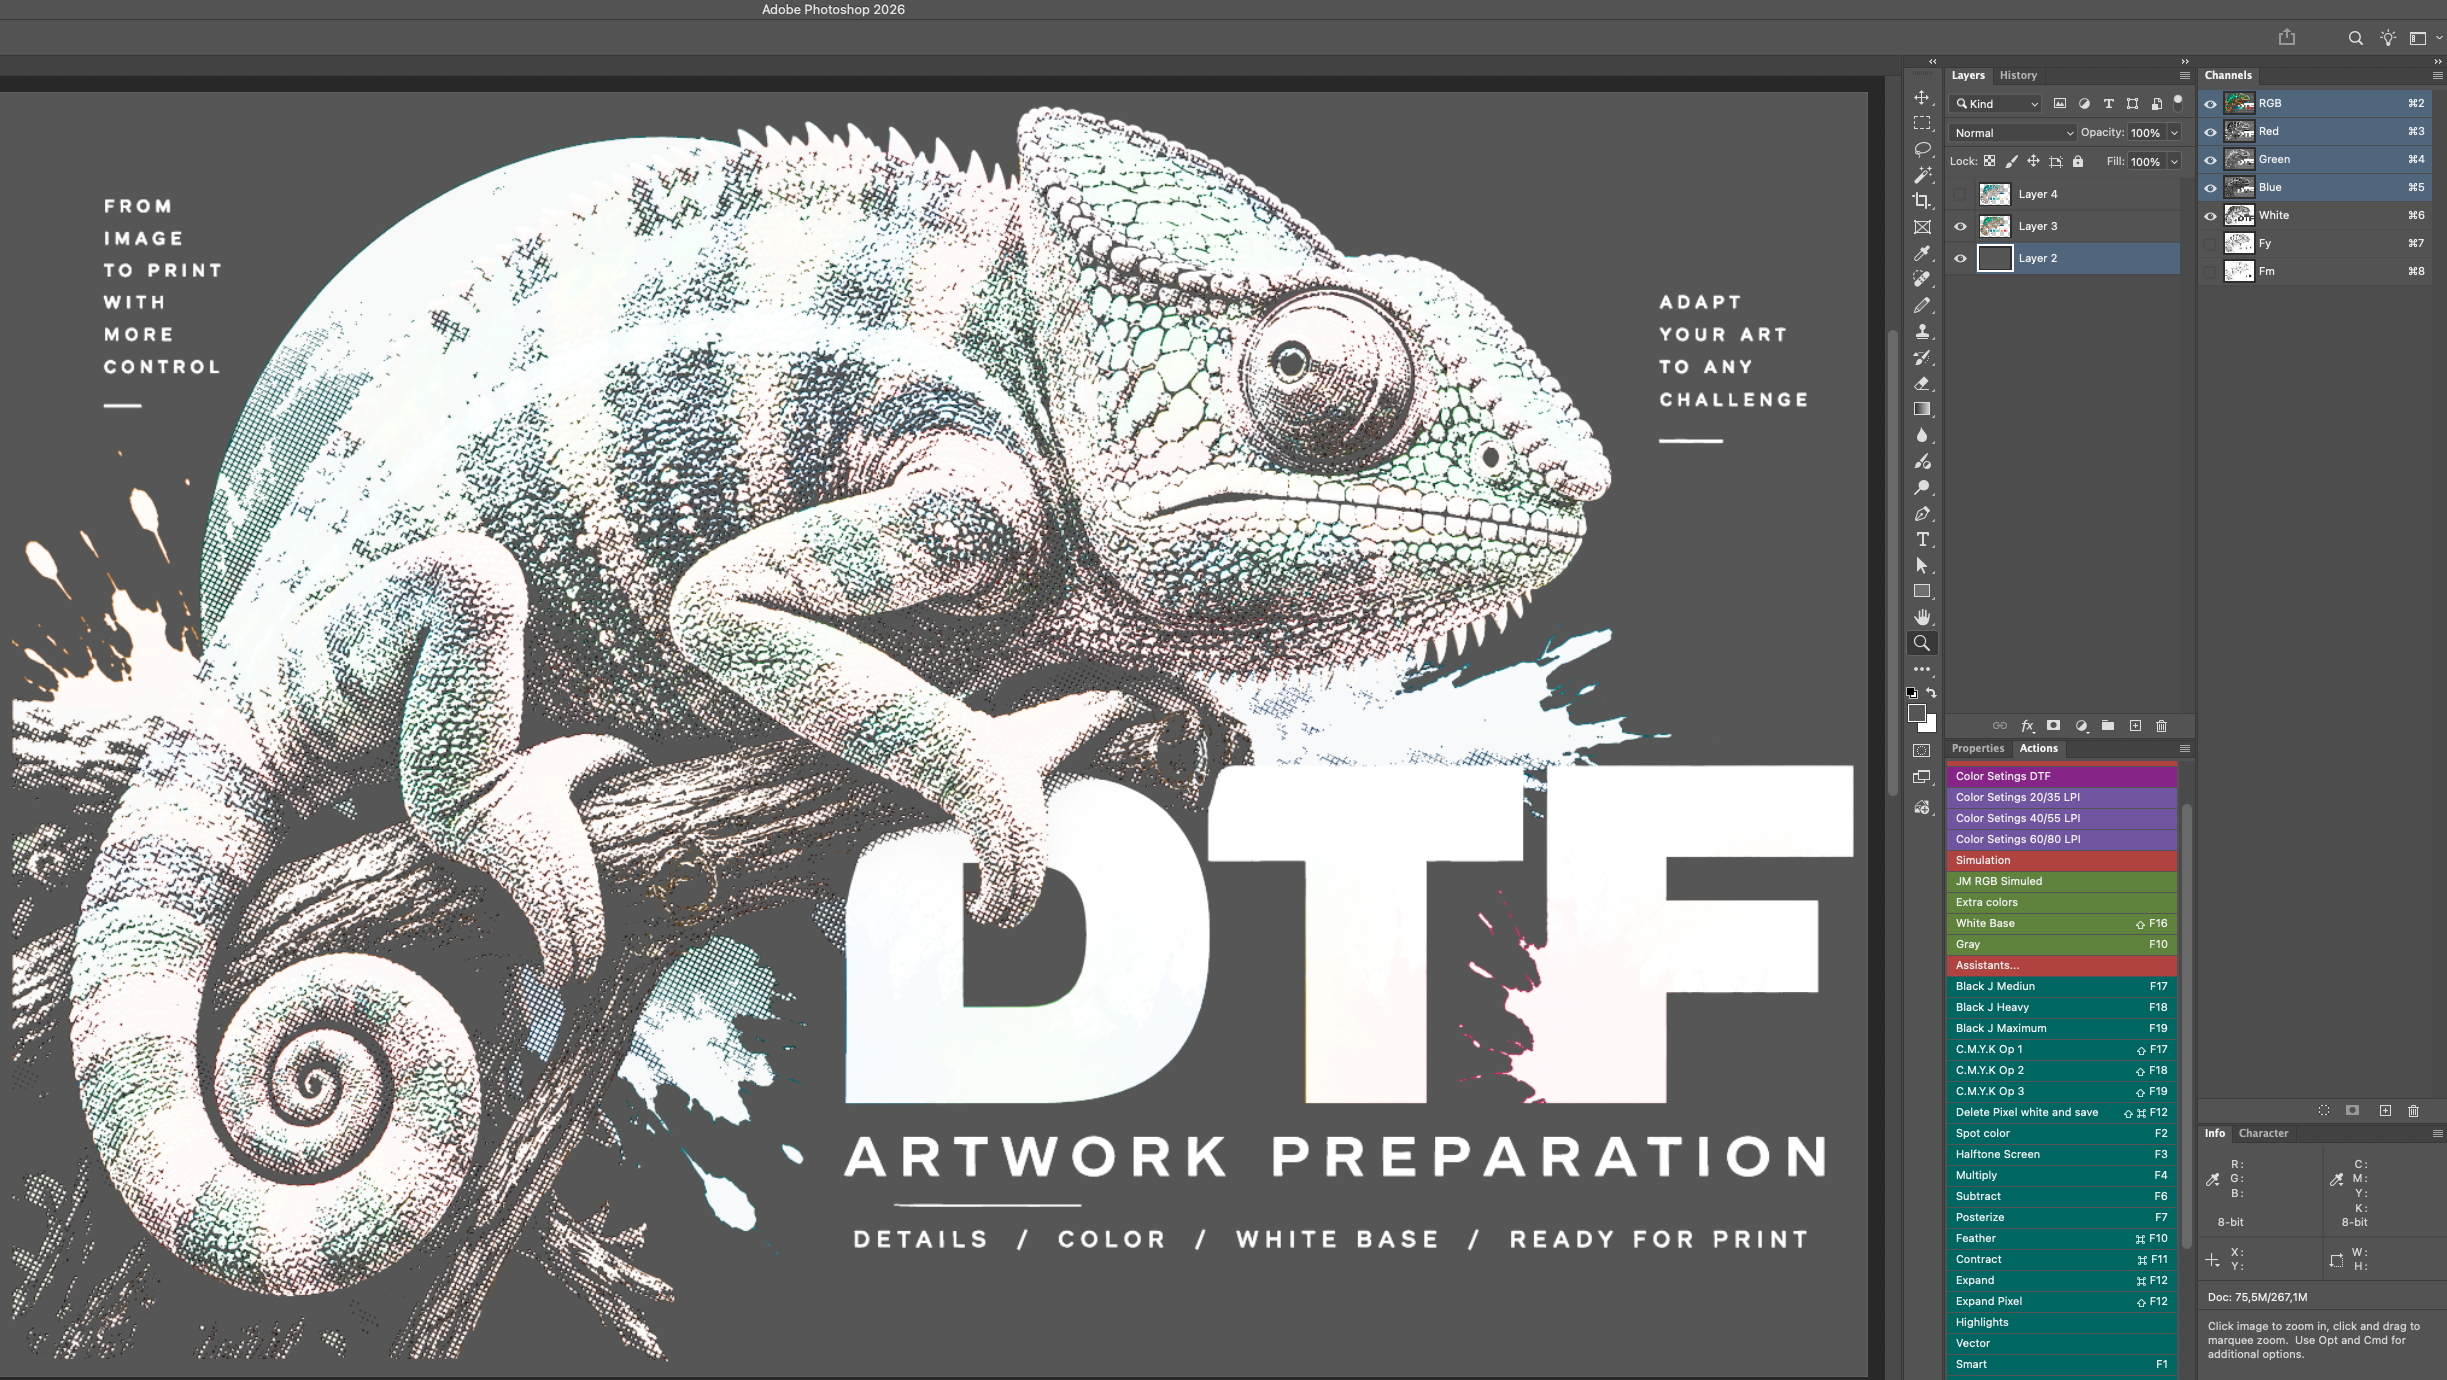
When the print workflow supports a separate Spot White channel, I can control the white base by region.
I can reduce white where needed and preserve its intensity where certain elements need to remain solid.
The idea is not simply to add more or less white. It is to define where it should be and in what amount.
Different equipment, different possibilities
Some DTF workflows receive a transparent PNG and let the RIP generate the white base automatically.
Others can work with files that already contain a separately prepared Spot White.
The level of preparation can therefore vary according to how the file will be printed.
For a simple workflow, I can deliver a prepared PNG.
When the equipment allows greater control, I can also prepare a more complete structure with a white base and individual Spot channels.
If your RIP or equipment has any specific requirement, you can tell me before the work begins.
Spot channels beyond white
Some DTF equipment uses additional inks beyond CMYK and white.
Depending on the machine, these may include fluorescent colors or other special inks.
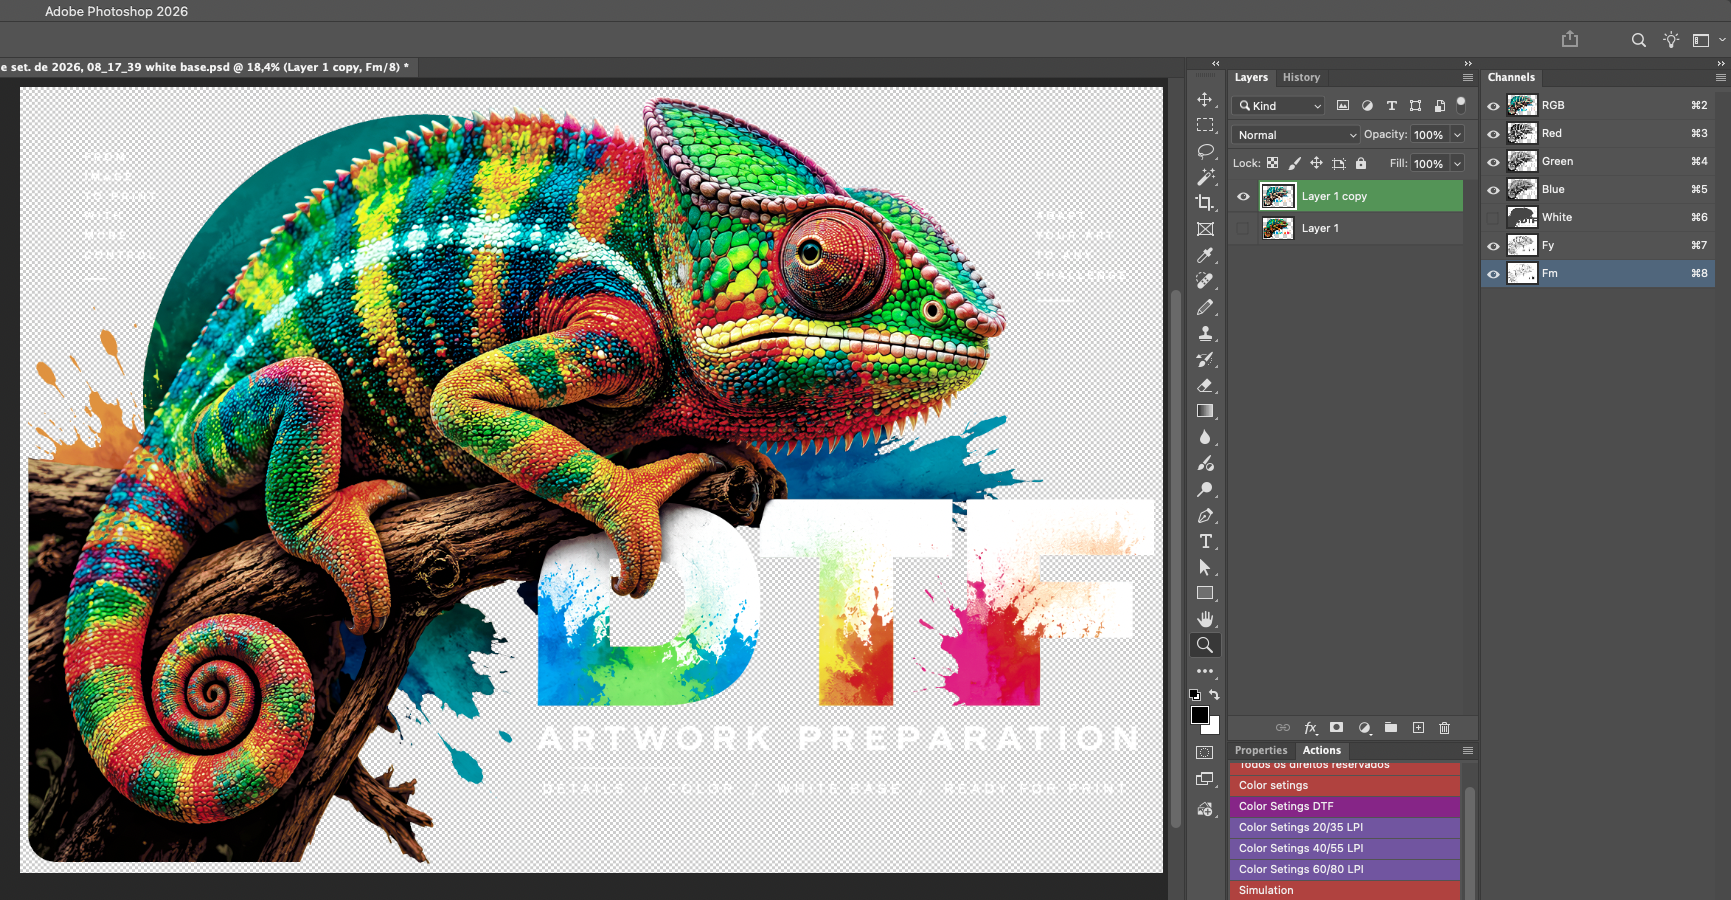
I can also prepare individual Spot channels for these colors, such as Fluorescent Yellow (FY) and Fluorescent Magenta (FM), or other channels available on the equipment.
These colors can be used in different ways.
In one area of the artwork, a special Spot may partially or completely replace the normal contribution of process colors. In other situations, it can work together with them to build new tones and expand reproduction possibilities.
Preparation follows the inks that are actually available and the way the RIP identifies those channels.
This makes better use of DTF equipment that offers resources beyond the conventional CMYK + white workflow.
Halftones and delicate details
Halftone areas require special attention to the white base.
If the white is reduced too much, some dots may lose the support they need. If white and colors are misregistered, very small details can also be compromised.
A job with halftones therefore needs to consider not only the image but also how white and colors will be reproduced together.
This control can make an important difference in highly detailed artwork.
Resolution is not just a number
It is common to see 300 DPI recommended for DTF files.
I prefer to assess the image, its final size, and the treatment it needs before defining the resolution.
For many jobs I use 450 or 600 DPI, especially when I want to preserve detail or work on more delicate areas.
Increasing resolution alone does not turn a bad image into a good one. File treatment remains the most important part.
Color and profile management
Color management is also part of professional preparation.
In my standard workflow, I work with the image in RGB with Adobe RGB (1998) embedded.
This choice comes from my practical experience with DTF. Among the profiles I have used and tested, Adobe RGB (1998) has provided good consistency between the work developed in Photoshop and its interpretation in the print workflow.
Keeping the profile embedded is important because the file carries a defined reference for how its RGB values should be interpreted.
For this reason, I prefer to preserve process colors in RGB during preparation and avoid an early manual conversion to a generic CMYK.
In the print workflow, the RIP can interpret that RGB with its embedded profile and make the conversion required for the process colors used by the equipment.
When I prepare a PDF with Spot White or additional Spot colors, those channels remain separate while the process portion can continue using the embedded RGB profile.
Adobe RGB (1998) is my working standard, not a limitation.
If your workflow uses another specific profile or has its own color requirement, this can be defined before file preparation.
What you receive
Delivery is defined according to the job.
As standard, I can provide:
Prepared PNG
A file with a transparent background, treated image, clean edges, and a resolution suited to the final size.
Print-ready PDF
Used mainly when the job has Spot White or additional Spot channels. My standard can keep Adobe RGB (1998) embedded for process colors and the Spot channels separate.
If your RIP requires another configuration or format, this can be defined before delivery.
Editable PSD
You also receive the Photoshop working file.
This lets you review how the material was prepared and, if necessary, later adapt a profile, Spot channel name, or another characteristic required by your own production workflow.
The idea is to deliver a file ready to use without taking away your access to the original project.
Test files
The images used on this page can also be made available in the test-files area.
You will be able to download PNG, PDF, and PSD versions, inspect the channels, and, if you wish, test the files on your own equipment or RIP.
Some examples will also demonstrate Spot White, halftones, and special channels such as FY and FM.
This lets you understand in practice the type of file I am describing here.
Every job is assessed before it begins
Not every artwork needs the same level of preparation.
Some need only cleanup and upscale.
Others may require rebuilding, transparency control, Spot White, halftones, or special Spot channels.
Before I begin, I assess the file and explain the approach I consider most suitable.
If you already know which formats, profiles, or special channels your equipment uses, you can tell me those details from the start.
If you do not know, that does not prevent the work. We can begin with the workflow best suited to what you need.
Your Client Area
After the project is ready, the files can be made available in your Client Area.
There you can download the material, access updated versions, and continue using the same project as a reference if you need a change later.
You can speak with me in your language
You can also speak with me directly through the site chat in your own language.
I receive your message translated into Portuguese, and you receive my reply translated back.
This makes it possible to discuss both a simple job and technical details of your equipment without requiring us to speak the same language.
How to send me your artwork
You can send the file by email or send me a Google Drive, Dropbox, or other service link.
Once I receive the image, I will assess the quality of the material and the type of preparation required.
If a characteristic of the equipment is important for that job, we define it before final preparation.